The Ultimate Opening a Salon Checklist

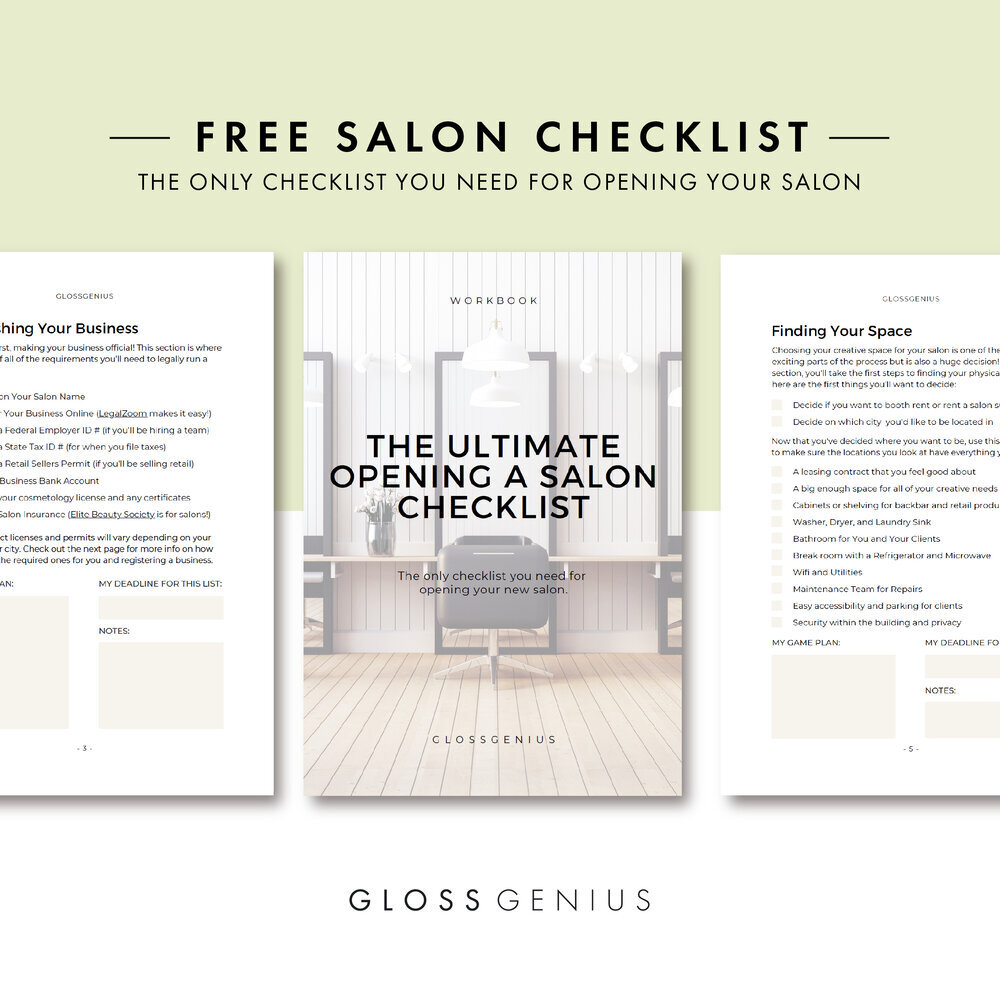
Our partners at GlossGenius have created the only checklist you need for opening a salon.

From organizing your legal docs to landing your first client, this step-by-step guide covers all the need-to-know salon essentials to get you ready for opening day so you can build your brand and stock your shelves in no time. 

As you work through each section, you’ll find resources to guide you through every step of the process. Take your time working through the dedicated creative spaces where you can brainstorm ideas, sketch out a game plan, and hold yourself accountable to deadlines. 

THE ULTIMATE SALON CHECKLIST INCLUDES STEP-BY-STEP GUIDANCE ON HOW TO: 

  • Establish your business. None of the “legalese,” just all of the details you need to run a business legally. 

  • Find your space. From suite selection to security, this is what to keep in mind for your new home away from home. 

  • Create your space. What you need to know for putting together an efficient (and aesthetic) physical space. 

  • Shop for supplies. A thought-starter for shopping all of your must-have tools of the trade.

  • Find and stock products. A place to track all your favorite products, determine how much you need, and figure out where to find them. 

  • Implement a marketing plan. Resources to help you spread the word and bring your business to life. 

  • Add all the finishing touches. Double-check these extra essentials to make sure you’re ready to roll out the red carpet for your first client. 

Download Yours Here

How to Brand your Beauty Business like a Pro

Have you decided to start your own business as a beauty professional? Great! The next step is creating your brand! This is one of the most exciting and fun parts of starting your own business. From your logo to how you design your space, you should create a vibe that is consistent with your branding. Having solid branding for your business will also make you look more professional to your clients. You can start creating your brand by asking yourself a few questions:

1. What Services are you going to provide and who is your target customer?

Are you a hair stylist who specializes in using organic products? Or maybe you are a lash artist who mainly services women? A Barber who services mostly men? Everything about your brand should be a representation of the services you provide along with being attractive to your target customer. Think about what colors, fonts and images align best with what your business provides.

2. What Kind of Experience do you want to Provide to your Clients?

The kind of environment and experience you want to create for your clients should come through in your branding as well. Are you going for a luxurious experience? Or are you thinking more laid-back? Start creating your brand personality by asking yourself these questions!


AdobeStock_171441850.jpeg

Now that you’ve taken some time to think about how you want to brand your business, it’s time to start putting it all together. If you need to get logo ideas, try browsing stock photo websites such as Adobe Stock or Shutterstock. There are also some great apps such as Canva where you can design a logo on your own. If you are not comfortable designing your own logo, you can always reach out to a Graphic Designer for help!

Your branding should include the following items:

  • Logo Design - Make sure you have different variations for use on different backgrounds, it’s best to have a full color, black and white version of your logo.

  • Color Palette / Fonts - Your brand colors should include 2 - 4 colors that are integrated into your logo, website, marketing materials and possibly even your actual work area (paint colors, artwork, etc.) You will also need to decide which font you want to use for your branding, usually it will be whichever font was used in your logo design.

  • Business Cards/Marketing Materials - Business cards may seem old school but it’s always nice to be able to hand something tangible to your clients especially if you decide to create a loyalty rewards or referral program - you can incorporate that into your business card design. Another great idea is to have bags with your logo on hand for clients who purchase product from you to take home.

  • Website / Social Media Elements - Incorporate your branding into your website or booking site by simply uploading your logo and including your brand colors. Lastly, don’t forget about your social media pages, make sure you have your logo and brand colors carried throughout your Instagram, Facebook and any other social media site you utilize to promote your business.

It may seem like a lot of work to brand your business, but it will be worth it! Branding is important because it creates a memorable impression on your clients and allows your clients to know what to expect from your business. It is a way of distinguishing yourself from the competition and showing what it is you offer that makes you the better option!

How to Take Photos like a Boss

AdobeStock_383581412.jpeg

Taking beautiful photos of your work is more important than you would think. Not only will you use these photos to build an impressive portfolio but they will also help build your clientele by attracting new clients to you! The good news is you don’t need to be a professional photographer to pull off beautiful photos. Most beauty professionals take client photos with their smart phone! Use these tips outlined below to take beautiful, Instagram-worthy client photos that will help build your clientele and increase your social media following:

AdobeStock_159552627.jpeg

1. Choose your Background Wisely

The background is almost as important as the work you are showcasing in your photo. You want your work to be the main focus of the photo so try to find a clean background. Find an area in the salon with a neutral colored wall (near natural light) or use a backdrop. A solid colored background is ideal so that you can really show off your work, if that’s not possible make sure your background is free of clutter and not distracting. Another option if you don’t have a solid color background is to use the portrait setting to blur the background, this will bring more focus to your work!

2. Lighting is Important

AdobeStock_252800632.jpeg

Natural lighting is always best! Try to find a spot where the natural light is flowing in but make sure to put the focus of the photo towards the light source. If the light is behind your client, it will wash them out and if it’s directly above, it may create unwanted shadows. If you don’t have a spot with natural light, you may have to use a lighting accessory like a ring light to help. Whatever you do, avoid fluorescent lighting, it can wash out colors and will definitely not make your work look its best.

AdobeStock_245425368.jpeg

3. Take Photos from Different Angles and Distances
Take multiple photos of your client from different angles and make sure you do a few close-ups as well. Not only will this give you a wide range of photos to choose from when you’re deciding which one to post, this will also give you more content that you can use later. Make sure you leave enough time between each client to take multiple photos of your work, you will be thankful you did! For each client, you should take a front, back, side and close-up shot.

4. Invest in a Better Camera
Think of the phone or camera you use to take photos of your work as an investment. Just like you would invest in buying a new pair of shears or a new curling iron for your business. You are going to use these photos to promote yourself and help grow your business so it is important! Also, be aware of the differences between taking photos with different cameras/phone models. In some cases, an older phone model might showcase darker more rich tones better while a newer phone might show the true tone of blondes better. Play around with different types of cameras and see what you prefer! Lastly, be careful using filters on your photos. You want your photos to look as close as possible to what it looks like in person.

5. Don’t Forget to Take the Before Photo

How many times have you said “I wish I would have taken a before photo”? Probably many times! Do not forget that before photo! This is especially important if you are doing a big transformation like a color correction, extensions or maybe a skin treatment to reduce fine lines and wrinkles! Either way, before photos can really help show off your work and help that after photo pop even more! You don’t have to use before and after shots every time but it’s nice to have the choice to show some variation in what you are posting to your social media pages.

Now that you have all of these awesome photography tips and tricks, get out there and showcase your work! Many beauty professionals say they forget to take photos or don’t have time for it. That is a huge mistake, in this industry taking photos of your work should be a priority and it will pay off in the end!

Vibe Pro Spotlight - Hannah with My Wax Room

IMG_2733_edited.jpg

This month’s Vibe Pro Spotlight is on Hannah Moss, owner of My Wax Room located in Suite 23 within Vibe Salon Suites in Plymouth, MI. Hannah provides a wide range of body waxing services but specializes in brazilians and brows.

Why did you decide to go solo and work out of a salon suite as opposed to working in a traditional salon or spa setting?

I chose to go solo and open my own business, because I wanted to give my guests the best waxing experience possible. My priorities have always been giving smooth results, and hygiene/cleanliness. With the freedom of owning my own suite, I can customize which waxes, technique and products will best suit the guests skin needs. Operating on a smaller scale also helps minimize potential exposure to germs. I have complete control over sanitizing between appointments, and ensuring everything is up to state board standards.

Did you tour other salon suites? If so, why did you choose Vibe?

I did look at several other salon suites before choosing Vibe. Originally was located out of my home in Garden City, but I wanted something more professional. Vibe Salon Suites gave me just what I was looking for. The building is beautiful, and the atmosphere is fresh and fun. I’m so happy with this location, proximity to Downtown Plymouth and the freeway are ideal.

What advice would you give to someone who is trying to decide if they want to go solo or not?

If your thinking going out on your own .. Do it! The rewards you get from taking responsibility of yourself and your career are just limitless. If you have a strong passion in your craft, and can micromanage your personal and business life. Then going solo with Vibe will definitely be worth it. Your investing in yourself!

What is the best thing about being an independent beauty professional?

The reward of feeling accomplished. Being able to service happy guests that love coming in for their waxes. Knowing the genuine care and service I give them comes completely from my heart.

What do you like most about your suite at Vibe Salon Suites?

What I like most about my Suite here at Vibe, would be the amount of storage within my room. I also really like not being fully responsible for the parking lot or bathrooms, they take care of that for you!


How to Raise your Prices when Moving to a Salon Suite

IMG_1975.JPG

If you’re making the transition to a salon suite from working in a traditional salon or spa setting, you may be wondering if you should raise your prices and how. Some beauty professionals may be nervous to raise their prices because they don’t want to upset their clients or cause them to go to another stylist. This is understandable, but as an independent beauty professional it is so important to charge what you’re worth.

You will be providing your clients with an upgraded experience in your salon suite. They will have the opportunity to enjoy your one on one attention, a private setting, and an experience customized just for them! Not only that, but if you are thinking about raising your prices, you’ve probably invested time in classes and learning new skills.

Lastly, you are now running your own business so your time is more valuable than ever! Here are some tips on if you should raise your prices, how to raise your prices, and also how to break the news to your clients:

Signs that you are ready to Raise your Prices:

  • Your income does not go as far as it used to because the cost of everything is rising.

  • Clients are consistently offering you large tips.

  • You’re feeling resentful from spending so much time and energy with clients who aren’t paying enough in return

  • You’ve taken multiple classes and spent time learning new skills and techniques

  • You’ve been in the industry over 5 years and have perfected your skills (experience = more compensation)

  • You’re located in a more expensive neighborhood with clients who care more about quality than cost

How to Raise your Prices:

  • Start with a 10% adjustment across the board on all services and then adjust from there

  • Start by charging only new clients the new pricing to see if its well received (did they seem surprised by the price or did they had over their credit card without hesitation?)

  • Time it well. Increasing your prices during a busier time of the year when it’s more difficult for clients to book an appointment elsewhere.

Announce your Price Increase:

  • Inform your existing clients a couple months before the price increase goes into effect

  • Consider writing a letter that can be sent out through email or social media explaining the reason behind the price increase (ex: services more in demand, in line with price increases on products you need to perform your services, additional education and training, etc.)

  • Update the pricing on your website or booking app

Lastly, do not ever apologize for raising your prices. Own it! You have put the work in to make it to this point and you deserve to earn what you are worth.